Wednesday, 27 January 2016

Sweet Beancurd Sheet with Bird Nest

Recently I decided to cook a simple desserts because I feel that I'm getting heaty and though I do not know if this dessert is "cooling" in nature or not but the fact that I eat this chilled is good enough for me! This is a very simple dump-it-all-in desserts which actually doesn't require a recipe but for those who are curious, this is it. 


Ingredients:

- 150gm beancurd sheets (腐竹)
- 160gm bird nest
- 160gm cooked gingko nuts
- 50gm + (150 to 200)gm rock sugar
- 4L water
- 1 egg


Method:

1. Soak the beancurd sheets in water to soften them. Soak the bird nest in a separate bowl.

2. Remove the little "stems" inside the gingko nuts.

3. Put the washed gingko nuts into a small pot and add enough water to cover them. Put in a piece of rock sugar (abt 50gm) and bring it to a boil. Continue to simmer for 10min. Leave aside to cool and let the gingko nuts soak in the syrup.

4. Bring the 4L of water to a boil and add in the 150gm rock sugar. Adjust the sugar amount to your liking. Make sure the sugar is dissolved completely before you add in the other ingredients.

5. Strain the gingko nuts from the syrup and put into the pot. Do the same for the beancurd sheets. Discard all the soaking liquids. Strain the bird nest and add them in too. Bring the whole pot to a simmer and simmer for few minutes. 

Tuesday, 19 January 2016

Lactation Cookies

All breastfeeding mommies will know that we are ALWAYS hungry. I often crave for food which are buttery and sweet so I eat a lot of cookies. Recently I baked my favourite Oatmeal Cookies and have been eating a lot of that. Since the ingredients between a regular oatmeal cookie and a lactation cookie do not differ much, the idea of baking lactation cookies pops up again. I mean since I'm going to eat a cookie, might as well eat one that is a milk booster, right?

The first time I baked lactation cookies was when I gave birth to my little P. I think I only baked it once. I wasn't exactly in great need of any milk booster at that time and also because those cookies didn't taste that fantastic. It had that bitter aftertaste, somewhat like beer, which I didn't fancy at all. So this round I try to find one recipe online that will taste good. I found one that is very similar to my Oatmeal Cookies and added cranberries and macadamia nuts instead of chocolate. I also try to reduce the brewer's yeast amount for a start; I reckon the bitter aftertaste from the previous bake was due to the brewer's yeast. This time round the cookies taste so much better! The texture is slightly different from the Oatmeal Cookies as it is more fibrous (because of the flaxseeds) yet softer. I recommend to bake it longer than 12min if you prefer a drier crunchier cookie.


Recipe adapted from: Dr Momma

Ingredients:

- 140gm unsalted butter
- 50gm caster sugar
- 50gm brown sugar
- 1 egg
- 1 tsp vanilla extract
- 40ml water1
- 115gm plain flour
- 1 tbsp brewer's yeast2
- 1/2 tsp baking soda
- 1/2 tsp cinnamon
- 1/4 tsp sea salt
- 95gm flaxseeds
- 105gm raw rolled oats
- 100gm cranberries
- 100gm macadamia nuts

Method:

1. Cream butter and sugars until light and fluffy.

2. Slowly add in beaten egg and vanilla extract into butter mixture as the mixer runs.

3. Slowly add in the water.

4. Sift flour, brewer's yeast, cinnamon, baking soda and salt in.

5. Add in flaxseeds. Fold the mixture a few times.

6. Add in the oats, cranberries and nuts and fold until even.

7. Bake at 175C fan forced for 12min1, 15min if you prefer a crunchier cookie.

***********************************************

Notes:

1. The texture of the cookie is rather soft and crumbly. Almost cake-like. If you prefer a crunchier cookie, you can either reduce the water amount or lengthen the baking time.

2. I only used 1 tbsp of brewer's yeast because I want to avoid the bitter aftertaste. So far there is no such taste in this batch. I might want to increase this to 2 tbsp next round since this ingredient is supposedly a milk booster. :)

Monday, 4 January 2016

Sweet Toasted Macadamia Nuts

Sweet toasted macadamia nuts: super addictive be-a-couch-potato-and-watch-tv snack to munch on. Need me to say more? Recipe is adapted from a recipe for a pie topping from Martha Stewart's book.
Ingredients:
- unsalted macadamia nuts of any amount
- water that is slightly lesser than enough to cover the nuts completely
- caster sugar of the same weight amount as water
Method:
1. Put everything into a small sauce pan. Use a small based pot. Make sure the mixture is just enough to fully cover the nuts. Bring everything to a boil. Boil for 1-2min.
2. Strain n spread nuts on a baking tray. Bake at fan forced 160C for 15min or until golden brown. Cool completely.

Monday, 14 September 2015

Pandan Chiffon Cake

I have always love Pandan chiffon cakes and so do my kids so when obviously the first chiffon cake I had to explore will be the Pandan flavour. I looked through a few recipes from various sources and eventually adapted one from My Baking Cottage. I have baked this recipe a few times and each time it gives me the same nice moist and tall chiffon cake. :)


Recipe adapted from: My Baking Cottage
 
Yields one 17cm chiffon tin cake
 
Ingredients:

- 4 egg yolks
- 20 gm + 45gm caster sugar
- 30 ml corn oil
- 60 ml coconut milk
- 1/2 tsp pandan paste1 (Koepoe brand)
- 1/2 tsp pandan essence
- 1/2 tsp vanilla extract
- 60 gm cake flour
- 10 gm corn flour
- pinch of sea salt
- 4 egg whites


Method:
 
1. Whisk egg yolks and 20gm caster sugar using a balloon whisk till slightly fluffy.
 
2. Add corn oil and mix till homogeneous.
 
3. Add in coconut milk, essences and extract. Mix till homogeneous.
 
4. Sift in cake flour, corn flour, salt into the yolk mixture.
 
5. Beat egg whites in a stand mixer till foamy. Add in 1/3 of the 45gm caster sugar. Continue to beat. Slowly add in the remaining 2/3 of the 45gm sugar as the whipping continues. Beat the egg whites till almost stiff peak.
 
6. Fold 1/3 of the meringue into the yolk mixture using a spatula. Ensure that it is homogeneous.
 
7. Fold in the remaining 2/3 of the meringue. Do not overfold.
 
8. Pour the mixture into an aluminium chiffon tin. Holding the sides of the tin firmly with your fingers and thumb on the centre (chimney looking part) of the tin, bang the tin a few times on the countertop to release trapped big air bubbles.
 
9. Bake at 160C (non fan) for 40min. Test doneness with a skewer. Cake is done if skewer comes out clean.
 
10. Remove from oven immediately and cool cake in tin placed upside down.
 
11. Unmould2 cake by pushing and pressing on the sides of the cake away from the tin. The skin of the cake will remain on the tin but the cake itself should come off easily. Remove the side of the tin when cake comes off completely. Do the same thing for the cake bottom.


*********************************************************************
 
Notes:
 
1. If you choose not to use pandan paste, you can substitute with same amount of pandan leaves juice. But the color and flavour of the final result might vary largely, depending on how concentrated is your home blended pandan leaves juice.
 
2. Please refer to this YouTube video on how to unmould by hand. The key is to be bold about it. If your chiffon cake is fully cooked, it should be springy and spongy enough for you to unmould it easily by hand. Have fun!

Thursday, 13 August 2015

Pete's Farm Banana Muffins

All along I love banana bread (kuih) as it is easy to make and it is a very popular choice among my kids. I have a recipe on my banana bread loaf which I simply adore but now I have another recipe that is a hot favourite among friends and family too! This recipe was given to me back in 2012 during a trip to New Zealand by a very generous lady named Gaye who runs Pete's Farm in New Zealand. She is the farmer's wife and she made hearty yummy breakfast for us during our farm stay then. One of the breakfast items was banana muffins and her banana muffins were so yummy! They were full of flavour, moist and the most interesting part was the muffins had crispy tops! I wasted no time in asking her for the recipe in which she had kindly shared with me. Recently I asked her for permission to share this recipe publicly on my blog as there are many people often asking me for it after seeing the photos of the muffins I made. She has kindly agreed to it so here I am sharing this delicious bake with all of you!


Adapted from recipe given by Gaye (Pete's Farm)
 
Yields: 8-10 muffins
 
Ingredients:

- 75gm unsalted butter
- 6 ripe Kampung bananas
- 155gm caster sugar
- 1 egg
- 225gm plain flour
- 1/2 tsp baking soda
- brown sugar (for sprinkling)
- cinnamon powder (for sprinkling)
 
Method:

1. Melt butter gently and set aside to cool.

2. Mash the ripe bananas with a fork. You can leave some chunks if you prefer to have noticeable banana bits in your muffins.

3. Add caster sugar to mashed bananas and mix well.

4. Mix beaten egg in and mix well.

5. Add in cooled melted butter and stir to ensure a homogeneous mixture.

6. Sift in plain flour and baking soda in a few additions and fold gently.

7. Line muffin trays with cupcake liners.

8. Scoop about 2 big soup-spoonfuls of batter into each cupcake liner, about 80% full.

9. Sprinkle cinnamon powder on top,  followed by brown sugar.

10. Bake in preheated oven at 190C (non fan forced) for about 25 min or until tester comes out clean. If you are baking on more than one rack, bake at 190C (fan forced) for about 20 min.

Tuesday, 23 June 2015

Tamago Boro Biscuits (小馒头)

How many of us love the Japanese little egg bun biscuits AKA 小馒头? I think many. I myself simply love to eat these! However they are very expensive! My kids love them too and I like that they are bite sized and toddler friendly but I don't like the idea that I will be giving my kids too much commercial cookies if I buy them often enough (I prefer to let my kids eat homemade cookies or sold by bakeries, not commercial ones with long expiry dates and sold in supermarkets). Hence I Googled online for the recipe to make them. I tried one some time back but the end product was utterly disappointing. It tasted nothing like the real thing and the texture was hard like rocks! It did looked like the real thing though. LOL.
 
I was browsing through Facebook (Baking's Corner iirc) today when I saw someone asking for recipes for 小馒头 and I tried one of the recipes someone posted in the comments and voila! This one works! It is not the 100% perfect recipe compared to the commercial one but it is VERY close. Please remember to read the notes at the end of this entry to see how you might want to further tweak my adapted recipe to bring it even closer to the commercial one.


My favourite Tamago Boro!

Tamago Boro Biscuits

Recipe adapted from: food4tots

Ingredients:
- 125 gm potato starch
- 20 gm cake flour
- 20 gm milk powder1
- 40 gm icing sugar2
- 1 tsp baking powder
- 1 egg3
- 2-3 tsp corn oil
- some cake flour for dusting

Method:
1. Sift all dry ingredients together. Set aside.

2. Add oil to the egg and beat with a fork. Start with 2 tsp of oil. If the final dough gets too dry at step 3, then add a bit more oil after you have mixed in the flours. There is no need to whip the egg mixture. Just beat sufficiently to mix it till homogenous.

3. Add egg mixture to dry mixture and using the fork, mix it into a dough. The dough texture resembles that of the mooncake skin dough.

4. Line your baking tray with baking paper. Working with one big tablespoon of dough each time, roll that small dough between your palms to form a log. Pinch off the log bit by bit to form the biscuits. It is very important the balls are very small, about 1/8 tsp sized. Place the pinched pieces on the baking tray. Dust your hands with cake flour from time to time.4

5. Once you are done pinching the small log, go back to the pinched pieces on the tray and roll them into balls using your palms. If you are good with your hands, you can even pinch and roll them into balls using your fingertips as you go about it. Repeat this until you finish rolling the dough into tiny balls. This is the most time consuming (hence tedious) part of the whole recipe. Rope in your older kids to help!

6. Mist the tray of balls lightly with water.

7. Bake in a preheated oven at 170C5 (fan forced) for 10-12min.

This recipe yields only a small container of Tamago Boro!

********************************************************************

Notes:

1.  I used my kids' formula milk powder.

2. If baking for children, 40gm of icing sugar will be sufficient but if you want the same sweetness as the store-bought Tamago Boro, I suggest increasing this to 50gm.

3. I used the egg my mother bought which unfortunately I have no idea how big but I'm guessing it is the typical 50/55gm sized. I will use the 60gm sized egg which I usually use, for next round because my mother did comment that the final product seems to be a little harder (less melt in mouth) compared to the store bought ones.

4. The dough is a bit soft and might stick to your hands/fingers from time to time. Prepare a big plate with some cake flour in it and rub your hands/fingers with the cake flour when that happens.

5. I baked mine at 170C for 10-12min and some of the biscuits got a little bit too brown. I will bake at 160C for 12-15min for next round.


Tuesday, 19 May 2015

Lemon Orange Chiffon Cake

When I first started exploring baking chiffon cakes, I have heard many saying that it is not easy baking one, mainly because chiffon cakes require beating up a meringue and most meringue based bakes are often tricky (just like macarons!). Problems can range from short cakes to cake collapsing after cooling to cake falling out of tin prematurely. However I have discovered for myself that even the infamously reputed-hard-to-make macarons can be quite easy to make as long as you pay attention to some details during the making.


During that time, I pored through many online recipes from blogs and various home bakers and of course, it started with the signature Pandan Chiffon cake. I was not prepared to do the trial and error method because I was not ready to be demoralised by a failed bake. So I did lotsa reading up of recipes and reviews and put together a recipe that is the end product of cross referencing a few popular recipes. That was for the Pandan Chiffon but today I'm going to share one that is citrusy. I mean you can't be eating Pandan Chiffon all the time right? So I did the same way of cross referencing a few recipes and "combining" the Yuzu Chiffon from DeQueenKitchen and the Orange Chiffon from My Baking Cottage, I came up with the following: Lemon Orange Chiffon cake.


Lemon Orange chiffon cake


Makes a 17cm chiffon cake tin


Ingredients:
- 4 egg yolks
- 10gm caster sugar1
- 40ml corn oil
- 30ml fresh lemon juice
- 30ml fresh orange juice2
- 0.5 tsp lemon extract
- 0.5 tsp orange extract
- 1 tbsp lemon/orange zest (optional)
- 60gm cake flour
- 10gm corn flour
- 0.25 tsp fine sea salt


For the meringue:
- 4 egg whites
- 50gm caster sugar


Method:

1. Preheat oven to 160C (non fan).

2. Put yolks and 10gm caster sugar into a big mixing bowl and whisk until the mixture is light in color and fluffy.


Add yolks and 10gm caster sugar together.

Whisk egg yolks and sugar till light and fluffy.

3. Add in the corn oil and whisk to get a homogeneous mixture.

4. Add in the juices, extracts and zest if preferred. I didn't put any zest for this particular entry.

5. Sift the cake flour, corn flour and salt together into the yolk mixture. Mix evenly with a balloon whisk.


Add in the dry ingredients.

6. Using a clean mixer bowl and whisk, whip the egg whites until big foamy bubbles appear. Gradually add in the 50gm caster sugar as the whipping continues.

7. Whip until the egg whites about to reach the stiff peak stage. It took me about 4-5 min on my Kenwood Chef speed #4 to reach this stage.

Whip egg whites and the remaining sugar till it is about to reach stiff peak.

8. Scoop a small portion of the meringue and add into the yolk mixture, fold gently with a spatula to get an even mixture.


Adding in a small portion of meringue before adding the rest will ensure that the mixture will be able to combine easily.

9. Add in the rest of the meringue and fold gently to get even mixture.

10. Pour into an ungreased chiffon cake tin and slam the tin (Hold the sides of the tin with your fingers and with your thumbs pressing down on the centre piece firmly) and slam the tin a couple of times on the countertop to release any big bubbles. Bake for 40min.


Remember to slam the tin a couple of times on the countertop to release any trapped big bubbles in the batter.

11. Cool the cake completely in tin upside down.

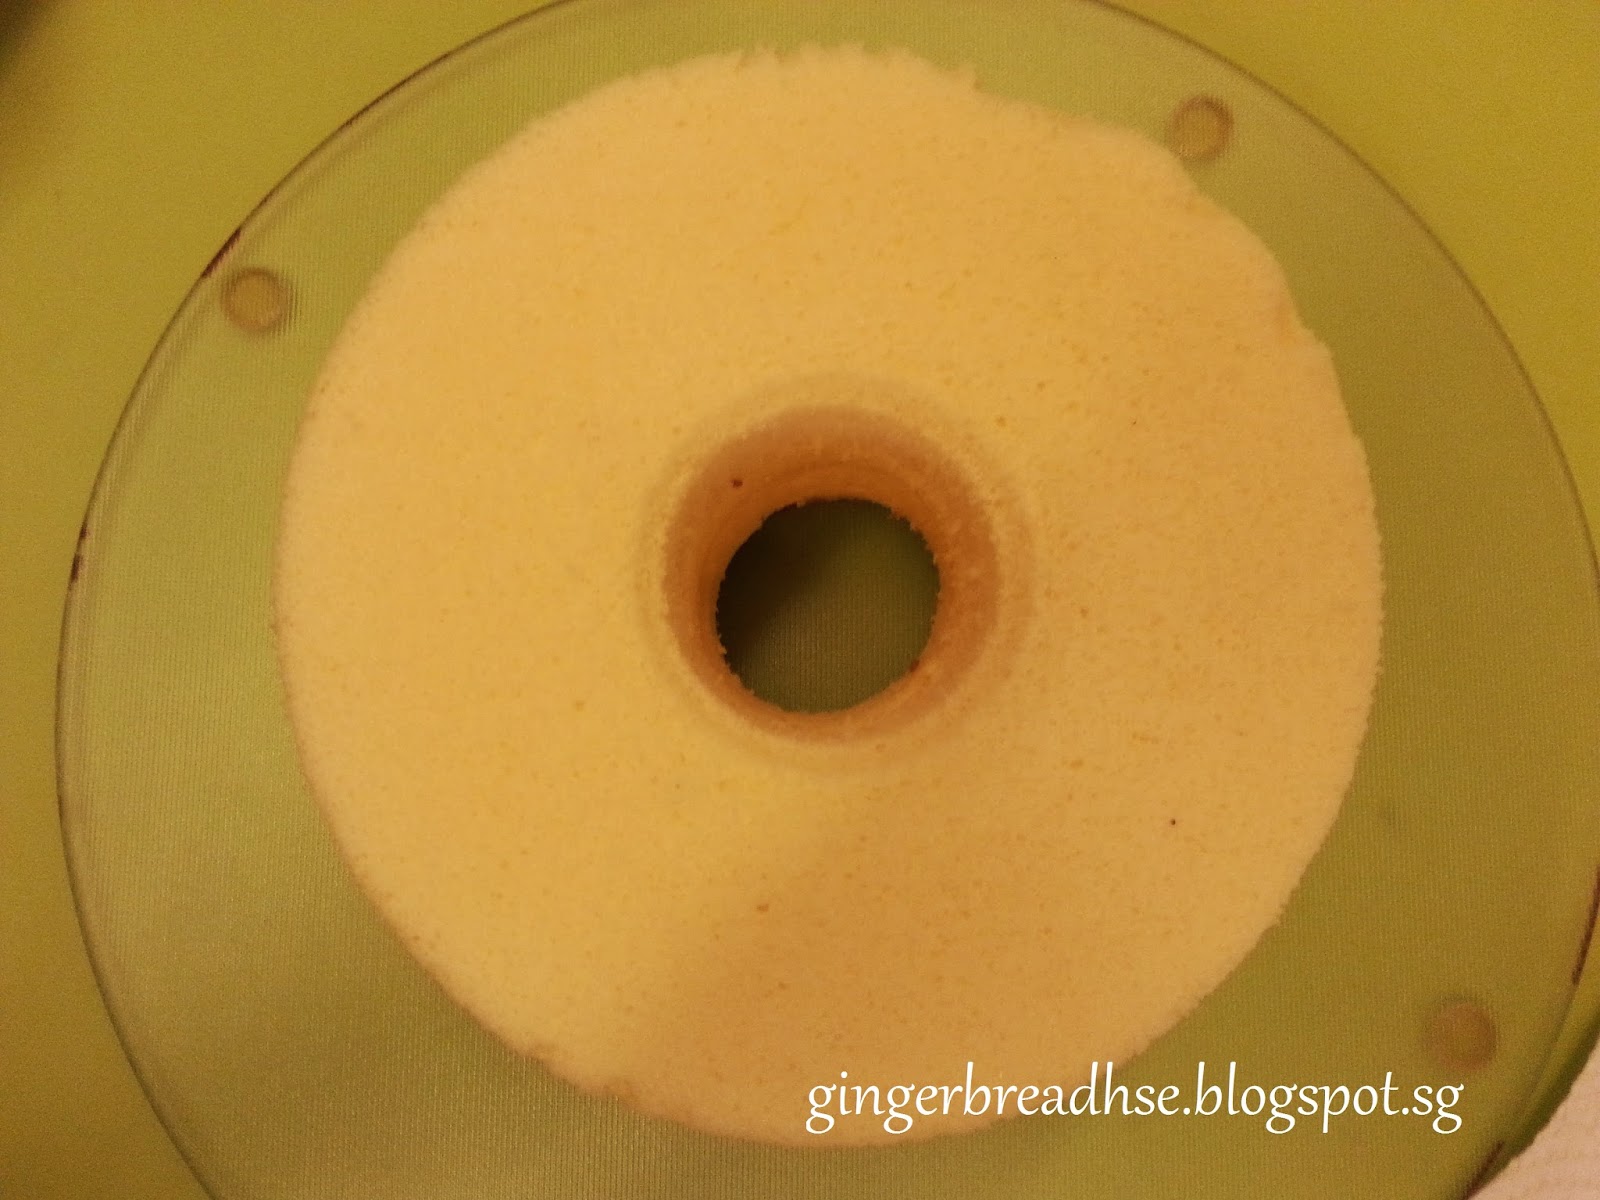
12. Unmould the cake by hand.3

Unmoulding the chiffon cake by hand will give you a pretty cake! 


********************************************************************

Notes:

1. This recipe is not very sweet, partly because I added in fresh lemon juice. If you have a sweet tooth, you might want to add 10-20gm more of caster sugar to the yolk mixture or alternatively, reduce the proportion of lemon juice and add more of the sweeter orange juice.

2. For this entry, I used Peel Fresh orange juice because I didn't have fresh oranges with me.

3. I always unmould my chiffon cakes by hand and not using a spatula or knife because that is the only way to get a nice non blotchy "skinless" chiffon cake. Please refer to this YouTube video on how to unmould by hand. The key is to be bold about it. If your chiffon cake is fully cooked, it should be springy and spongy enough for you to unmould it easily by hand. Have fun!